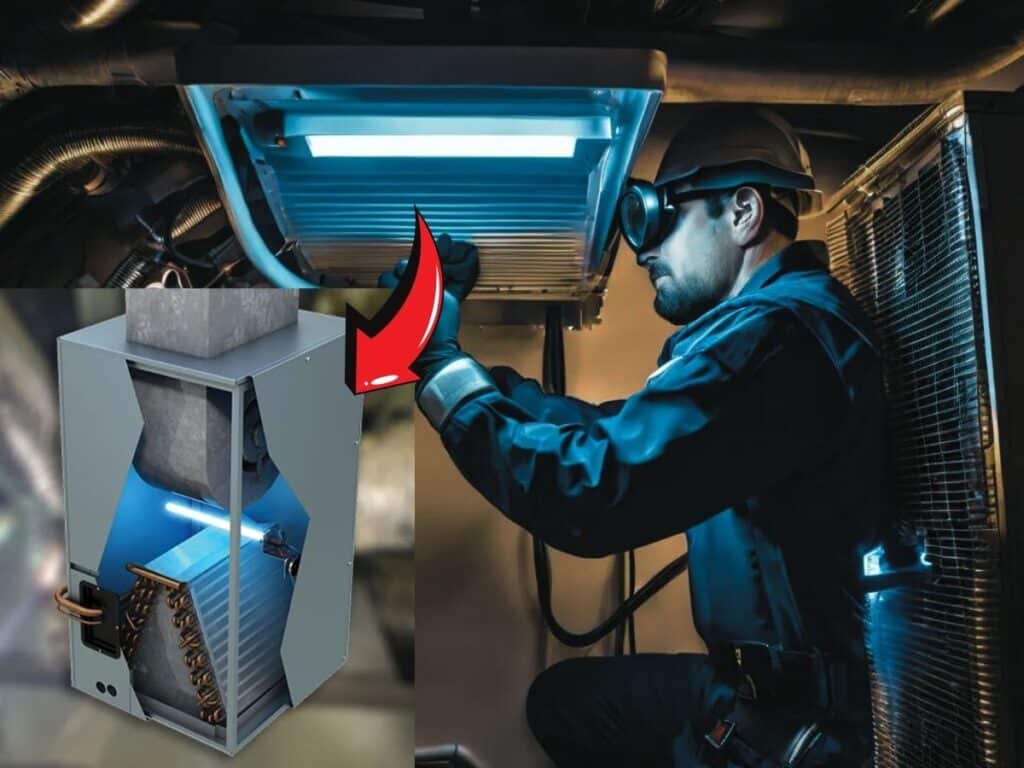
In today’s world, indoor air quality is a growing concern. While regular cleaning and air filters help, installing a UV light in your HVAC system can provide an extra layer of protection against airborne contaminants like mold, bacteria, and viruses. These lights use ultraviolet (UV-C) radiation to neutralize these harmful microorganisms, contributing to a healthier and more comfortable home environment. This friendly guide will walk you through the process of installing a UV light in your HVAC system.
UV lights designed for HVAC systems are typically installed inside the ductwork or near the air handler. When air passes by the UV light, the UV-C radiation disrupts the DNA of microorganisms, effectively inactivating them.
There are two main types:
- Coil Sanitizing UV Lights: These are installed near the evaporator coil of your air conditioner. They primarily target mold and bacteria that can grow on the damp coil, improving system efficiency and preventing musty odors.
- Air Sanitizing UV Lights: These are installed within the ductwork and are designed to sanitize the air as it circulates through the system. They are more effective at targeting airborne contaminants.
Before you start, consider these crucial factors:
- Type of UV Light: Decide whether you need a coil sanitizing or air sanitizing UV light based on your needs. A combination of both can offer the most comprehensive protection.
- Placement: Proper placement is essential for optimal effectiveness. Consult the manufacturer’s instructions for specific placement guidelines. Generally, coil sanitizing lights are placed near the evaporator coil, while air sanitizing lights are placed in the return or supply duct.
- HVAC System Compatibility: Ensure the UV light you choose is compatible with your HVAC system. Consider the size of your ductwork and the airflow.
- Electrical Requirements: UV lights require a power source. Ensure you have a suitable electrical connection near the installation location. If you are unsure about your home’s wiring or electrical panel capacity, consult a qualified electrician.
- Safety Precautions: UV-C radiation is harmful to eyes and skin. Never look directly at the UV light and always turn off the power to the HVAC system before working on it.
Installing a UV Light: A Step-by-Step Guide

Now, let’s proceed with the installation process. Remember to always turn off the power to your HVAC system at the circuit breaker before starting any work.
1. Gather Your Tools and Materials
- UV light kit (appropriate for your HVAC system)
- Screwdriver or drill
- Hole saw or metal cutting tool
- Measuring tape
- Safety glasses and gloves
- Electrical wire connectors
- Duct tape or sealant
2. Turn Off the Power
Locate the circuit breaker that controls your HVAC system and turn it off.
3. Access the Installation Location
Depending on the type of UV light and your HVAC system, you’ll need to access either the evaporator coil area or the ductwork. This may involve removing access panels or cutting into the ductwork.
4. Install the Mounting Bracket
Follow the manufacturer’s instructions to install the mounting bracket for the UV light. Ensure it is securely attached.
5. Install the UV Light
Carefully insert the UV light into the mounting bracket.
6. Connect the Wiring
Connect the UV light’s wiring to the power supply, following the manufacturer’s instructions. Ensure all connections are secure.
7. Seal Any Openings
If you had to cut into the ductwork, use aluminum foil tape to seal any openings to prevent air leaks.
8. Restore Power
Turn the power back on at the circuit breaker.
9. Test the UV Light
Check that the UV light is working. You should see a faint blue glow. Do not look directly at the light.
Specific Instructions for Coil Sanitizing UV Lights
- These lights are typically installed near the evaporator coil, either above or below it.
- Ensure the light is positioned to effectively irradiate the coil surface.
Specific Instructions for Air Sanitizing UV Lights
- These lights are typically installed in the return or supply duct, ideally in a straight section of ductwork.
- Consider the airflow in the duct when positioning the light.
Important Safety Precautions
- UV-C Radiation Hazard: Never look directly at the UV light. Prolonged exposure can cause eye and skin damage.
- Electrical Safety: Always turn off the power to the HVAC system before working on it.
- Professional Installation Recommended: If you are not comfortable working with electrical wiring or HVAC systems, it is strongly recommended to have a qualified HVAC technician install the UV light.
Maintaining Your UV Light
- Replace the UV Bulb: The UV bulb will need to be replaced periodically, typically every 1-2 years, depending on usage.
- Clean the Bulb: Periodically clean the UV bulb with a soft cloth to remove dust and debris that can reduce its effectiveness.
By following these steps and taking the necessary precautions, you can successfully install a UV light in your HVAC system and enjoy the benefits of cleaner, healthier indoor air. Remember, if you have any doubts or concerns, consulting a qualified HVAC professional is always the best course of action.


