The idea of “charging” a heat pump in heat mode can be a bit confusing. Unlike charging a battery, it doesn’t involve plugging anything in. “Charging” in HVAC terms usually refers to adding refrigerant, the substance that absorbs and releases heat. This guide will clarify what “charging” means for heat pumps in heating mode, why it’s usually not a routine task, and what you should do if you suspect a problem.
What “Charging” a Heat Pump Really Means
“Charging” a heat pump means adding refrigerant to the system. This is only necessary if there’s a refrigerant leak.
- Refrigerant and System Performance: Refrigerant is essential for efficient heat transfer. If there’s a leak and the refrigerant level is low, the heat pump’s heating capacity will be reduced.
- Charging is Not Seasonal Maintenance: Adding refrigerant is not something you do regularly, like changing air filters. If your heat pump needs refrigerant, it indicates a problem (a leak) that needs to be fixed. Simply adding refrigerant without repairing the leak is a temporary fix and will lead to recurring issues and potentially damage the system.
How to Charge a Heat Pump: What the Pros Do
Charging a heat pump isn’t a DIY task—it’s a job for licensed HVAC professionals. This complex process requires specialized tools, in-depth knowledge of refrigeration systems, and compliance with safety regulations. For homeowners, understanding the basics can help you feel confident when speaking with a technician about your system. But remember, handling refrigerants without proper certification isn’t just risky—it’s illegal in many places!
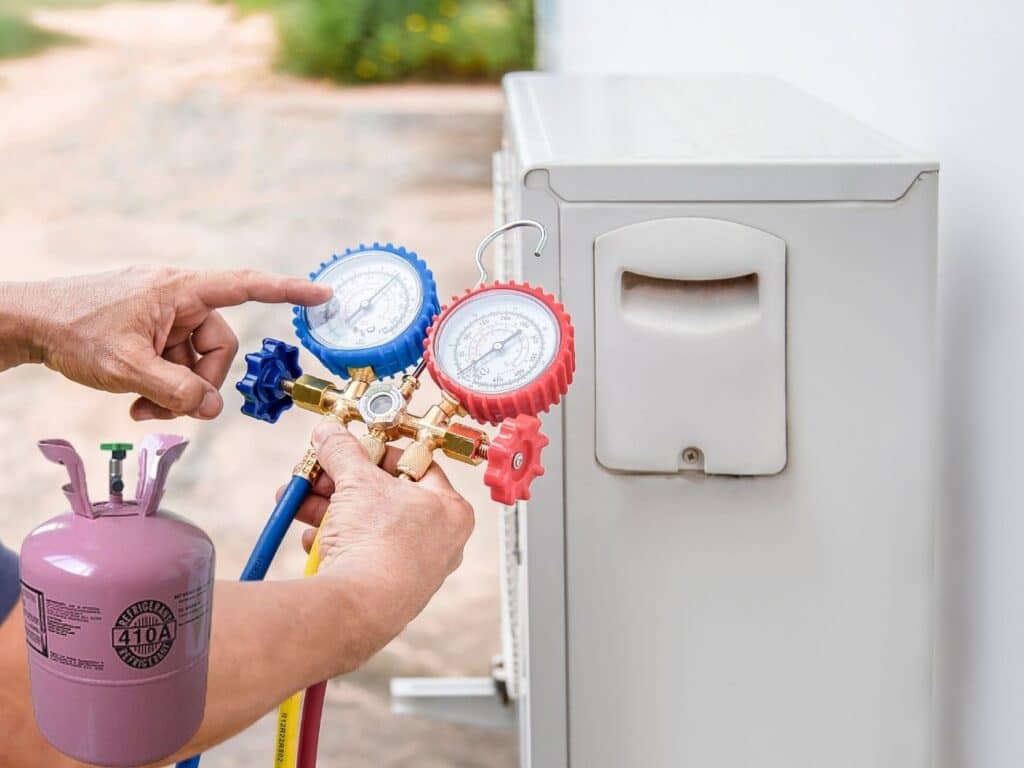
Below, we’ll walk through the step-by-step process that professional HVAC technicians follow to charge a heat pump safely and effectively.
1. Gather Necessary Tools and Equipment
- Refrigerant (correct type as per the system’s specifications, such as R-410A or R-22).
- Manifold gauge set.
- Digital thermometer.
- Scale (to measure refrigerant weight).
- Gloves, safety goggles, and HVAC certification (if you’re performing this task professionally).
2. Switch the Heat Pump to Heat Mode
- Set the thermostat to heat mode and adjust the temperature to ensure the system is running.
- Allow the system to operate for at least 10–15 minutes to stabilize pressures.
3. Connect the Manifold Gauge Set
- Turn Off Power: Shut off the power to the heat pump before connecting the gauges.
- Attach the Gauges:
- Connect the blue hose to the suction port (low side).
- Connect the red hose to the discharge port (high side).
- Secure Connections: Ensure all connections are tight to prevent refrigerant leaks.
4. Measure System Pressures
- Turn the system back on and monitor the pressure readings on the manifold gauge.
- Compare the readings to the manufacturer’s specifications provided in the unit’s manual.
5. Add Refrigerant
- Weigh the Refrigerant:
- Place the refrigerant cylinder on a scale to measure the exact amount being added.
- Introduce Refrigerant:
- Slowly open the low-side valve on the manifold gauge to introduce refrigerant into the system.
- Add refrigerant in small increments while monitoring the pressure gauges.
- Observe the System:
- Allow time for the system to equalize after each adjustment.
- Check the outdoor unit’s performance, ensuring it operates efficiently.
6. Monitor Superheat or Subcooling
- Measure superheat (suction line) or subcooling (liquid line) depending on the charging method specified by the manufacturer.
- Use a digital thermometer to take accurate readings.
7. Fine-Tune and Test the System
- Adjust the refrigerant charge until the system operates within the specified parameters.
- Test the heat pump by checking the indoor and outdoor temperature differential and ensuring proper heating.
8. Disconnect Tools and Seal Ports
- Turn off the system and remove the manifold gauge set.
- Replace the service port caps securely to prevent refrigerant leaks.
Why Your Heat Pump Become Less Effective
Several factors can affect your heat pump’s performance in cold weather, and these are often mistaken for needing a “charge”:
- Lower Outdoor Temperatures: As the outdoor temperature drops, the amount of heat the heat pump can extract also decreases. This is normal operation.
- Auxiliary Heat Kicks In: Most heat pumps have auxiliary or emergency heat (usually electric resistance heating) that automatically activates when the heat pump can’t meet the heating demand. This is why your energy bills might be higher during very cold periods.
- Frost Buildup on the Outdoor Coil: During heating, the outdoor coil can get cold enough to accumulate frost.
- Defrost Cycle: Heat pumps have a defrost cycle that periodically reverses the refrigerant flow to melt the frost. You might see steam or hear a gurgling sound during this cycle—this is normal.
- Dirty Air Filters: Restricted airflow from dirty filters reduces the heat pump’s efficiency.
- Regular Filter Changes: Replace your air filters every 3-6 months, or more often if you have pets or allergies.
- Blocked Outdoor Unit: Snow, ice, leaves, or other debris can obstruct airflow to the outdoor unit.
- Keep the Area Clear: Ensure the area around the outdoor unit is clear of any obstructions.
When Refrigerant Might Actually Be the Problem (and What to Do)
Although not usually a winter-specific issue, a refrigerant leak can affect heating performance. Here are signs that might point to a leak:
- Ice Buildup on the Indoor Unit: While frost on the outdoor unit is normal during defrost cycles, ice forming on the indoor unit is a strong indicator of a refrigerant problem.
- Reduced Heating Output: If your heat pump struggles to heat your home even when it’s not extremely cold, a low refrigerant level could be the cause.
- Hissing or Bubbling Sounds: A hissing or bubbling sound coming from the unit could suggest a refrigerant leak.
If you suspect a refrigerant leak, contact a qualified HVAC technician immediately. Refrigerant handling requires specialized tools and training, and improper handling can be harmful to both you and the environment.
Maintaining Your Heat Pump for Optimal Heating Performance
Regular maintenance is key to maximizing your heat pump’s efficiency and minimizing the chances of problems:
- Regular Air Filter Changes: As mentioned, change your filters regularly.
- Annual Professional Tune-Ups: Schedule annual professional maintenance. A technician will check refrigerant levels, clean the coils, inspect electrical connections, and ensure all components are working correctly.
- Clear the Outdoor Unit: Keep the area around the outdoor unit free from debris and obstructions.
In short, you don’t “charge” a heat pump in the same way you’d charge a battery. If your heat pump isn’t heating effectively, it’s more likely due to other factors like low outdoor temperatures, frost buildup, dirty filters, or airflow obstructions. If you suspect a refrigerant leak, seek professional help. Regular maintenance is the best way to keep your heat pump running efficiently and reliably, providing comfortable heating throughout the winter.
