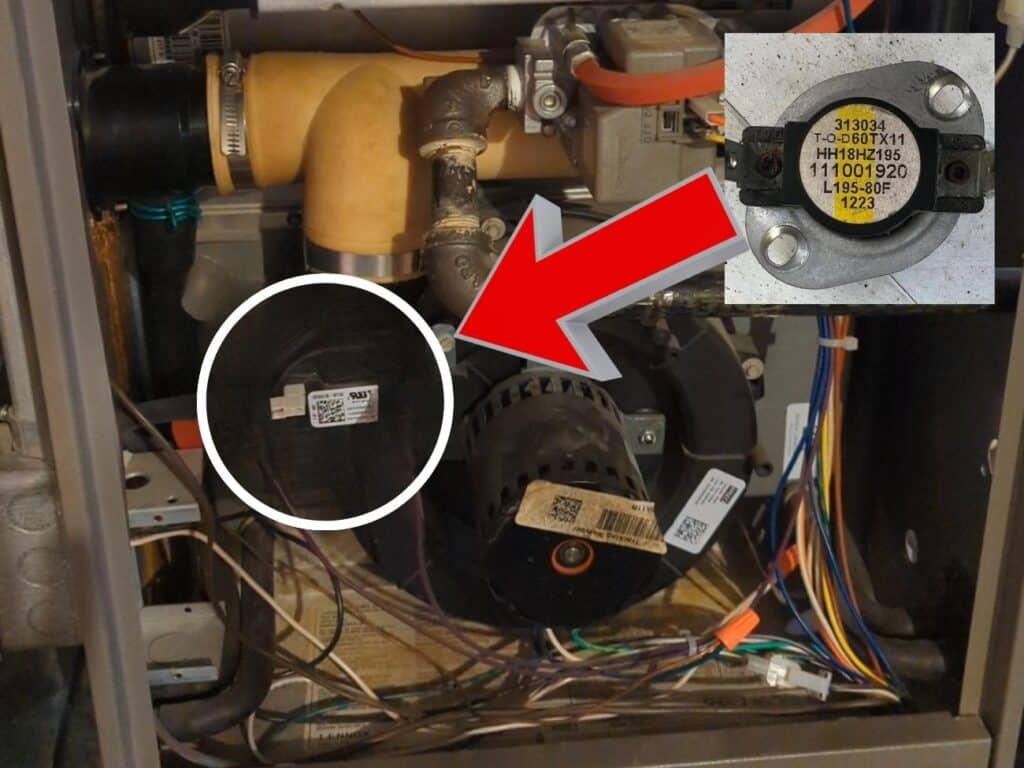
Your furnace limit switch is a critical component that ensures your furnace operates safely and efficiently. It prevents your furnace from overheating by shutting it down if the temperature inside exceeds a safe limit. If your furnace isn’t functioning properly, testing the limit switch is a good step in troubleshooting the issue. Don’t worry if you’re not an HVAC expert—this guide will walk you through the process in simple, friendly steps.
What Is a Furnace Limit Switch?
Before diving into testing, it’s helpful to understand what a limit switch does.
The furnace limit switch is a temperature-sensitive device that monitors the temperature inside the furnace’s heat exchanger. If the temperature exceeds a certain threshold, the switch opens, cutting off power to the gas valve and shutting down the burners. Once the furnace cools down, the switch closes again, allowing the furnace to restart (under normal operation).
When a limit switch malfunctions, it can cause problems like:
- The blower fan running continuously.
- The furnace shutting down prematurely.
- No heat being produced.
Step 1: Gather Your Tools
Testing a furnace limit switch requires a few basic tools:
- A multimeter (to test electrical continuity).
- Screwdriver (usually Phillips or flathead, depending on your furnace).
- Safety gloves (for protection).
- Flashlight (to see into tight spaces).
Step 2: Turn Off the Power to the Furnace
Safety first! Before working on your furnace, turn off the power to it at the circuit breaker. This will prevent electrical shocks and protect you while testing the limit switch.
Step 3: Locate the Limit Switch
The limit switch is typically found inside the furnace cabinet, mounted on or near the heat exchanger. Look for a small rectangular or round device with wires connected to it. If you’re unsure, consult your furnace’s user manual for guidance.
Step 4: Remove the Limit Switch
To test the limit switch, you’ll need to remove it from the furnace:
- Use your screwdriver to remove the screws securing the furnace’s access panel.
- Locate the limit switch and take note of how it’s connected.
- Disconnect the wires attached to the switch. Label them or take a photo to remember their placement.
- Unscrew the limit switch from its mounting bracket and set it aside.
Step 5: Test the Limit Switch with a Multimeter
Now it’s time to test the limit switch for continuity. This will determine if the switch is functioning correctly:
- Set your multimeter to the continuity or resistance (ohms) setting.
- Place one probe of the multimeter on one terminal of the limit switch and the other probe on the opposite terminal.
- Check the multimeter’s reading:
- Continuity Test: If the switch is working, the multimeter should emit a beep or show a low resistance value.
- No Continuity: If the multimeter doesn’t beep or shows no reading, the switch is likely faulty and needs to be replaced.
Step 6: Inspect the Limit Switch for Damage
While testing, visually inspect the limit switch for any signs of damage, such as:
- Burn marks or discoloration.
- Corrosion on the terminals.
- Cracks or physical wear on the switch housing.

If you notice any of these issues, replace the limit switch.
Step 7: Reinstall or Replace the Limit Switch
If the limit switch passes the continuity test and shows no signs of damage, reinstall it:
- Screw the switch back into its mounting bracket.
- Reconnect the wires to their original positions.
- Replace the furnace access panel and secure it with screws.
If the switch is faulty, purchase a replacement that matches your furnace model. Install it using the same steps.
Step 8: Restore Power and Test the Furnace
Once the limit switch is reinstalled or replaced:
- Turn the power back on at the circuit breaker.
- Set your thermostat to call for heat and observe the furnace’s operation.
- Ensure the blower fan turns on and off correctly and the furnace heats your home as expected.
Troubleshooting Tips
If your furnace continues to experience issues after replacing the limit switch, consider these additional steps:
- Check the air filter: A dirty air filter can restrict airflow and cause the furnace to overheat.
- Inspect the ductwork: Blocked or leaky ducts can impact furnace performance.
- Call a professional: If you’re unsure about the problem, an HVAC technician can diagnose and fix the issue.
Preventing Limit Switch Problems
To keep your furnace limit switch in good working condition, follow these maintenance tips:
- Change the air filter regularly: A clean filter ensures proper airflow and prevents overheating.
- Schedule annual tune-ups: Professional maintenance can catch small issues before they become big problems.
- Keep the furnace area clean: Dust and debris can interfere with furnace components.
While testing a furnace limit switch is a relatively simple task, there are times when it’s best to call a professional. Seek expert help if:
- You’re uncomfortable working with electrical components.
- The furnace has multiple issues beyond the limit switch.
- The problem persists after replacing the switch.
Testing and replacing a furnace limit switch can seem intimidating, but with the right tools and guidance, it’s a manageable task. By following this friendly guide, you can troubleshoot your furnace, restore its functionality, and keep your home warm and cozy. Remember, safety comes first, and don’t hesitate to seek professional assistance if needed!


